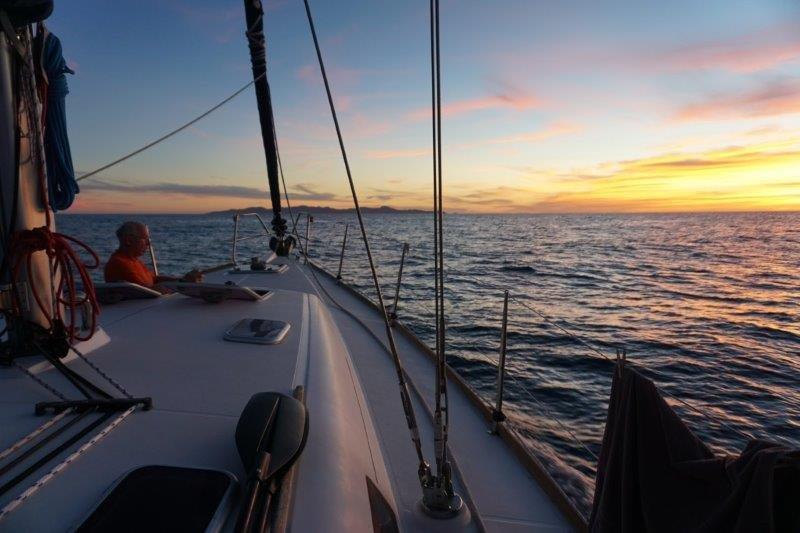
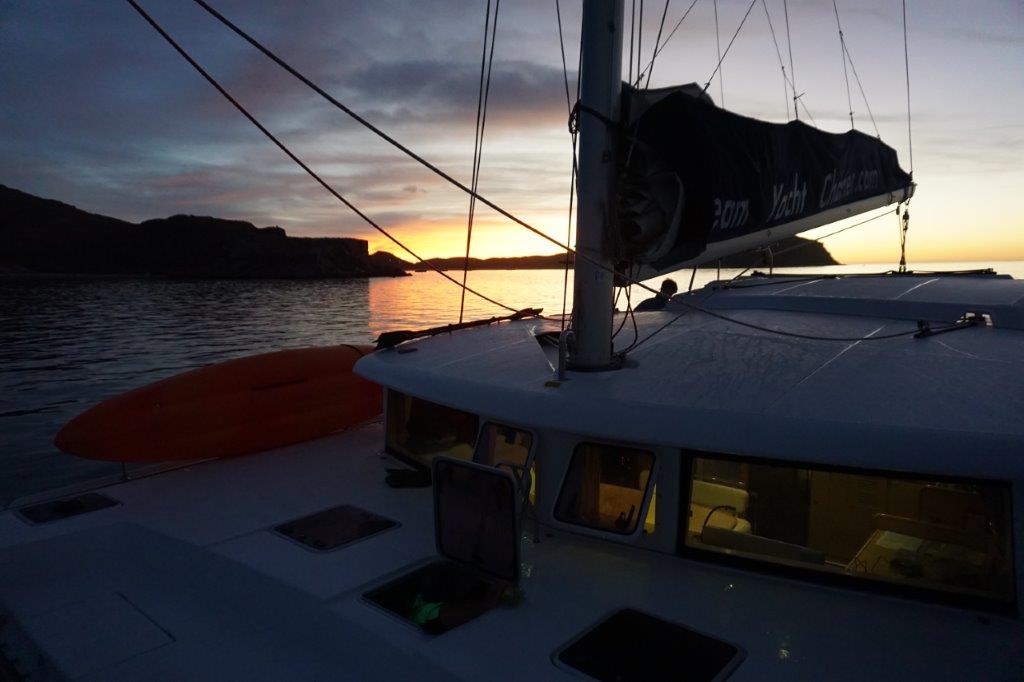
Why the Sea of Cortez?

Uncrowded Beauty

Imagine yourself leading family and friends on a week-long charter on a new Lagoon 450 catamaran.  You can do this because you’ve achieved your Bareboat Charter Master Certification and Catamaran Endorsement, having gotten your training in these same waters with Santana Sailing.  Now, this boat is yours for the week.

The air is warm as you depart the marina, and your guests share a bit of excitement with you as a Manta Ray leaps out of the water with great flapping wings.  Your guests don’t know the area but have heard about it, and you feel confident in the training you’ve received.

Photo: Wes Smith

Good Sailing

It’s the Sea of Cortez.  You could sail anywhere in the world, but you’ve come to this place.  With warm water, uncrowded anchorages and abundant sea life, The Sea has attracted luminaries like Scuba Pioneer Jacques Cousteau, author John Steinbeck, and legendary cruisers Lin and Larry Pardey, all of whom spent significant time in and on these waters.

The Sea of Cortez is one of the most stunning cruising grounds in North America

Photo: Wes Smith

Different and Fresh

The Sea of Cortez is a completely different and fresh experience from the Caribbean or Mediterranean.    No crowds, no boat boys, few tourists, no race to the next mooring field – just stunning scenery, a good sailing breeze, and a chance for solitude. 

Photo: Wes Smith

World Class Instruction

You can also get your International Sailing License (SLC) and/or Bareboat Charter Master training and assessment completed during the week with Santana Sailing.  And, it is very easy to get there – a 2h 30m  flight will bring you from LAX to Cabo. 

Read this blog I wrote, published by NauticEd for additional details:  Cruise The Sea of Cortez

Jaw Dropping Sunsets and Sunrises

Frequently the sunsets are so amazing that the conversation just stops. And when you wake up to the sound of bare feet pattering on deck with hushed oohs and ahhhs, get out of bed and grab your camera.

Contact us to learn more about Instructional Cruises and Slow Cruises on The Sea. Scroll down for a gallery of un-retouched sunsets and sunrises.

Water in the Diesel - Ooops!

Which Deck Plate is That?

This might happen to you one day.  I’m glad in retrospect that it happened to me, and right at the start of a trip I was leading. That’s because this is how it always happens - at exactly the wrong time, and it has to be fixed right now! I never would have set this up as an instructional opportunity on purpose, but it worked very well that way.

The start of the trouble was simple enough. We were prepping the Catalina 42 Betty for departure, and I asked a crew member to top-off all the water tanks. There are a series of deck plates on Betty. 4 of them are for filling the water tanks, 2 for pumping out black water in the holding tanks , and one for filling the diesel fuel tank.

As you can imagine, our crew member was mortified when red diesel fuel came spurting up out of what she thought was the starboard aft water tank deck fill. When she realize what happened and came to tell me, she looked like she felt she had sunk the boat, and our trip.

There’s a Straightforward Fix

It turns out that though time consuming, the fix is actually very straightforward.  Click on the thumbnail below to play the video segment and see how we fixed it.

Here’s the fix.

  • Get ready with a plastic bottle, and start the engine. 

  • Don’t let the water fill the bowl to the top!  Engine off, drain, and repeat. 

  • Dispose of the waste fuel-water properly. 

It took about 2 hours to drain about a gallon of water.  We left for our Anchoring At Catalina weekend, kept checking the bowl in the Racor fuel-water separator, and drained a little more water after each time we had the engine on.  At the end of the 3-day trip, we had all but a tiny fraction of it out.

That was a great outcome, and a real test of how well the fuel-water separator works.

What happens after you change that shredded impeller?  Clean out the heat exchanger!

Sharp Eye on the Temperature Guage

If you read my last guest blog, you’ll remember that I was over the moon about being able to change the oil on our 1989 Catalina (Universal 25 XP).  Well, that was one of the easy jobs!  A few weeks back as we were motoring back into the harbor after a delicious sail off Long Beach, I glanced at the engine temp gauge and noticed it was 240 degrees.  Yep, panic set in and I quickly shut her down!

Impeller before…

Impeller after…where’d those pieces go?

Impeller after…where’d those pieces go?

Most likely culprit? The impeller.  Marc successfully showed me how to replace the impeller (we always keep spare parts on board) and then we knew we were going to have to get to the heat exchanger!  Project for another day!

Cleaning Out the HX

Of course, the “another day” arrived and armed again with my favorite site on maintenance for our Catalina 34’ (www.realitycheck.me) we prepared for a BIG project.  Thanks again to Steve and Rebecca for such great explanations, instructions and photos!  

New zinc installed

Impeller pieces removed

Impeller pieces removed

One of the first steps was getting all of the coolant out of the engine.  Once that was done, it was safe to remove the heat exchanger.  We replaced a couple of hoses at the same time though it probably wasn’t necessary.  I knew I would need new gaskets for the ends of the heat exchanger and they were readily available from Catalina Direct.  I was so curious to see what would be in the heat exchanger!!  Indeed, we found a good chunk of the pencil zinc anode that had broken off and lots of pieces of impeller! 

After cleaning out the HX,  I flew into artistic mode with a burgundy scotch bright pad, scrubbing all the corrosion off the end caps til they were as shiny as a brand new penny!  

HX before…

HX after

She Looks Pretty, Burps, and Runs Cool

I cleaned up the heat exchanger by using a wire brush as per Steve’s advice then, the really fun part, I painted the heat exchanger Old Ford Blue!  It looks beautiful!  Put the gaskets on the end caps, sealed everything up and Marc and I worked together to clamp the heat exchanger and hoses back on.  We filled the coolant and started the engine…. Oh no!! Overheating!  We tried a couple of things, when my brilliant Captain thought there might be an airlock where we previously had the water heater.  That was the ticket!  We released the air (burp!) from that and we were in business!  It’s so important to get that heat exchanger off and cleaned out if you have lost a zinc or have bits of impeller that have broken off.  While it was challenging and an almost all day project for us, being the first time, when we have to do it again, it will be so much easier!

Chrissie - First Mate

Balancing the Helm

Hi Sailors,

I’m excited about this informative series of blogs on the themes we’re emphasizing on our upcoming Grenadines trips:  SAIL; EXPLORE; GROW.  The theme of this first blog is SAIL, and the subject is, Balancing the Helm.

Let’s Start With a Definition
Balancing the helm is the process of adjusting the sails so that the boat tracks in a straight line, with only minor corrections using the wheel, or tiller.  I can remember way back when, wondering about this myself and asking, “Why worry about balancing the helm?  I’ll just steer the boat where I want it to go.  Right?”

Why Balance the Helm? 
The short answer is that you’ll sail faster, ease the load on your autopilot, or on your helmsman, and enable self-steering without an autopilot.  And that last one is a big one.  Ah, an easier overnight passage, staying on course, arriving at your destination sooner, and not being worn out - that’s why! 

I got my education on this subject back in the mid ‘90s.  It was an overnight passage from Ensenada in Baja, Mexico, to Dana Point, CA.  On that windy night, the instructor and trip leader, Mark Howe, had us tie in the second reef on the main, trim the sails a bit, and lock down the wheel-brake on the helm saying, “There, we’ve set the autopilot.”  He went below to make bouillabaisse for dinner and I was amazed that the boat tracked straight, keeping us on course plus or minus about 5 degrees on the compass throughout the night.

How Do You Know When Your Helm is Balanced?
It’s easy.  Can you lock the helm down without the autopilot and have her maintain course, plus or minus 5 to 10 degrees?  Can you steer with two fingers, making only minor adjustments?  Is your autopilot quiet, barely correcting course?  Those are signs your helm is balanced.

What Happens When You’re Not Balanced?
Here are the symptoms:  you lock down the helm but she won’t maintain course, rounding up into the wind; the autopilot steers a meandering course and gets over powered; the person steering is really getting a workout, and the boat is difficult to control.  Time to balance the helm.

How Do You Balance the Helm?
Here’s a mnemonic to remember:  Mainsail Up, Headsail Down.  That is, a trimmed main, by itself, turns the boat Up, closer to the wind.  A trimmed headsail, by itself, turns the boat Down, away from the wind.  By adjusting the sail controls in small increments on either the main or jib, to increase or decrease power, you’ll begin to see how the boat responds.  If the problem is weather helm (the boat turning Up toward the wind), you need to depower the main. 

Note how the leech of the main, in the area of the sail number and above it, is twisted and far more open than the portion of the leech below it. Twisting off the main, as shown here, is just one way to depower the mainsail.

Learning to Find the Balance
Remember that 1) different boats will behave differently, 2) that it’s easier to get the boat to steer herself when closer to the wind, and 3) that things also change with the wind speed.  For practice, take your boat out in a moderate breeze and experiment with getting it to steer itself.  Don’t engage the autopilot - lock the helm down when you are tracking straight.  Then, give it a couple of minutes to see whether she stays on course, heads up closer to the wind, or falls off, down from the wind.  To dial it in, start making simple adjustments, one at a time, to the main, and then the jib.  You really don’t need to know yacht design or aerodynamics to figure this out.

And, there’s another way.  Balancing the helm and sail plan is just one of the practices you’ll work on mastering when you join us on our upcoming sail-training adventures - follow this link to learn more!  It’s a week of sailing, learning to navigate and explore new cruising grounds, and working on the skills you want to master.

THOUGHT STARTER:  I can think of 6 methods I regularly use for either powering up or depowering the main.  What can you come up with?  Comment below or email me!

See you on the water,

Marc Hughston
Santana Sailing

P.S.  Up next with the EXPLORE theme – Sizing Up a New Anchorage.

4. Crew Overboard Rescue Maneuvers

Click here to download a PDF of this article

Heave-To and Downwind Methods

Below are diagrams that I have been using for years to help sailors get a visual image of the Heave-To method, as well as the most effective ways to return to your person in the water (PIW) from a downwind point of sail.

The Heave-To method is by far the most effective method when sailing on a beat to a beam reach.  We have practiced this in up to 30 kts of wind on OCC's Catalina 42, Betty, and the beauty of the maneuver is that it's fast, and minimizes separation from the PIW when out in the open ocean.  Plus, you avoid the wildly slapping jib sheets when using methods that have you luff up to slow and stop the boat at the PIW.

Downwind, the Heave-To method does not work reliably.  The best downwind rescue maneuver is the Deep Beam Reach, aka the Broad Reach-Close Reach, and this and its variants are shown on the Crew-Overboard Recovery Methods from Downwind page below.  

Note:  this is not a comprehensive treatment of the subject, and different maneuvers may work better on other types of boats.  The maneuvers detailed here do work exceptionally well on a modern sailboat with a masthead rig, fin-keel, and spade-rudder, such as the Catalina 42.

For a larger view, right-click and select open in new tab, or, copy image and paste into a Word document.

A discussion on the subject of Crew Overboard Rescue maneuvers would be great.  Please leave your comments using the "Comment" link below!

A Real MOB Rescue in Newport Harbor

My First Real MOB Recovery – “This is NOT a drill!”    By Chrissie Oppedisano

Planning for a leisurely late afternoon sail in a Harbor 20, Marc and I had just left the OCC docks in Newport Harbor.  I was at the helm on a broad reach, Marc at the jib.  Not far from the dock, in the middle of the channel, we saw a capsized RS dinghy and a man having a rather difficult time trying to get the boat upright.  The wind was blowing from the west at about 12 kts.  The boat was on its side with full main and jib, and the spinnaker was wrapped around the forestay.  We decided to see if we could give him a hand and started upwind to reach him. 

Marc called out to him, but he didn’t answer.  At that moment, as the late afternoon sun’s rays were hitting the water, I saw an arm flailing in the bright reflection on the water about 100-150 feet upwind. Uh-oh!  Looks like someone got dumped when the RS capsized.  And because of the wind, the dinghy had drifted quite far away from the person in the water (PIW).  Wow, all those practice drills sent my brain into automatic response as I called out “man overboard” and started spotting.  Marc took over the helm (thank God!) and as our PIW was right smack into the wind, Marc fell off and came back up to approach her.  She was starting to panic and was crying out that she couldn’t hold out much longer.  Maybe she wasn’t a swimmer, I don’t know, but the shore was only 150 yards in either direction. 

We approached and got the flotation PFD to her.   Now we had to get her out of the water.  I grabbed her by the seat of her foulies, Marc pulled her up and over into the boat, and I helped her out of her wet foulies. Phew!  Good thing she was a petite little thing!    Happy Ending!

Lessons learned

What I noticed immediately is that the woman had not been wearing a PFD so she was left to try and tread water in about 65 degrees, probably colder.   ALWAYS wear that PFD, even if you are “just” in the harbor.  While she may have been cold, at least with flotation she would not have felt like she was going under and probably would have felt more visible.

Second, she was panicking!  Her brain apparently could not comprehend that she was quite close to shore and probably could have gotten there by swimming.  When fear takes over, logic goes out the window.  She may have been afraid of getting hit by one of the big luxury yachts that are frequently navigating the Lido Channel, or she may have been afraid of drowning, being weighed down by her clothes, who knows?  I realized though, it doesn’t matter – when you get dumped in the water, you may go into panic mode.

In a way it felt like a “mini” man overboard rescue – but it was for real and for MY first MOB recovery, honestly, I was thankful it was just in the harbor.   It was a gentle training ground and a rescue that I felt calm and in control of carrying out, thanks to the great training I have received (and having Marc right there!!).  It gave me a chance to reflect on the reality of the situation – what I needed to do, what I would have done had I been by myself, and seeing first-hand what happens to a person who is in the water!

So, how did the story end?  As we were getting this woman out of the water, the RS skipper had gotten the boat upright and our boats met up.  The woman jumped right back into the RS and off they went sailing downwind!  Guess it’s kind of like falling off a horse and getting right back on it!  Wow!

5. Why, When, and How to Reef

OCC's Catalina 42 Betty, with the first reef tucked in, in the windy lane off Santa Cruz Island during one of the Northern Channel Islands trips

OCC's Catalina 42 Betty, with the first reef tucked in, in the windy lane off Santa Cruz Island during one of the Northern Channel Islands trips

Why to Reef

When the boat is heeling over with a rail in the water and you are fighting the helm to steer a straight line, it’s tempting to believe that something good is happening.  This is actually what it feels like to be overpowered, and this is an inefficient and less safe way to sail. 

Here is what is really happening:  as the boat heels over, the keel inclines at such an angle that it no longer effectively prevents leeway, and the boat slips sideways – that’s inefficient.  The overpowered sail plan and angle of heel cause the boat to continually want to round up in to the wind (excessive weatherhelm), and that forces you to turn the rudder and drag it sideways in an effort to keep the boat straight – that’s inefficient.

Why reef?  Control, safety, and speed - you’ll be a lot faster and safer when the boat is more upright with a balanced helm.

When to Reef

When the wind picks up to around 12-14 knots true with whitecaps all around and you are sailing upwind, for most boats, it’s time to reef.  Some boats are more “tender” and may need to reefed earlier, while others are more “stiff” and reefing might be delayed.  The two main indicators are 1) excessive weatherhelm, and 2) excessive heeling.  

The basic rule of thumb is that if you are wondering if you should reef, it's time.  Increasing weather helm and heeling over 15 degrees are the early indicators, and if you are fighting the helm for control and the leeward rail is buried, you have waited too long.  If the weather forecast and your observations tell you conditions are sure to build, reef early before it gets rough. 

Downwind, it’s a little more deceptive.  Helm control is the key indicator here – if you are having trouble keeping the boat on course because of excessive weather helm, reef the main.

How to Reef the Main

The 4 primary steps to reefing the main are below.  While each boat will differ in the way it is rigged and while you will have to ease the main sheet and vang to accomplish steps 3 and 4, these primary steps are transferable to any modern sloop rigged cruiser/racer.

1.  Lower the halyard

2.  Secure the tack

3.  Tension the luff

4.  Secure the clew

With practice, you will be able to reef in less than 60 seconds, and that’s important because then, you will never hesitate to reef when you need to.

6. When In Doubt...Let It Out

Click here to download a PDF of this article

You've heard this before, right?   “When in doubt, let it out.”  You’ve no doubt even said the same thing to your crew.  But, have you wondered exactly why it’s so important?  The questions I get in my Basic Cruising classes remind me that knowing how and why things work is an important part of the foundation one needs.
 
So, why let the sail out until it luffs, and bring it back in until it stops luffing?  Why ease the genoa sheet two inches so the leeward telltales lay back in line with the windward telltales?  It's because that’s where the power is.  As the old saying goes, “Any time two sailboats are in sight of one another, it’s a race.”  That may not be true for everyone, but it’s fun to go fast!  And, better sail trim just
might make the difference in getting to Catalina before sundown.  Take a look at the image below. This sail is over-trimmed, and needs to be eased out.  

The Over-trimmed Sail
Wind comes from the right hand side

Source:  "The Art and Science of Sails" by Tom Whidden

Source:  "The Art and Science of Sails" by Tom Whidden

The sail trimmer’s goal is attached, laminar airflow.  The most common sail trim error made is to over-trim, meaning, to have the sails in too tight.  The photo above shows what airflow over the sail looks like when it is over-trimmed.  Note the turbulence of the separated flow on the leeward side of the sail - lift is reduced, and drag is increased.  That’s slow!  When you see your leeward telltales lifting and fluttering, this is what’s happening. 
 

There is much more to race-winning sail trim than this, but use the following procedure to get your basic trim in the right ball park: 

  1. When in doubt, let it out.
  2. Let it out until it luffs. 
  3. Bring it back in to where the luffing just stops.